Why does the closed bolt full auto UZI shoot so fast?
This is a common question that this article hopes to address.
What is it?
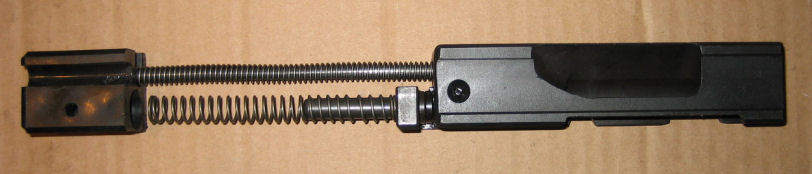
Below is a picture of an IMI full auto closed bolt assembly for the full size UZI – this is a 9mm bolt
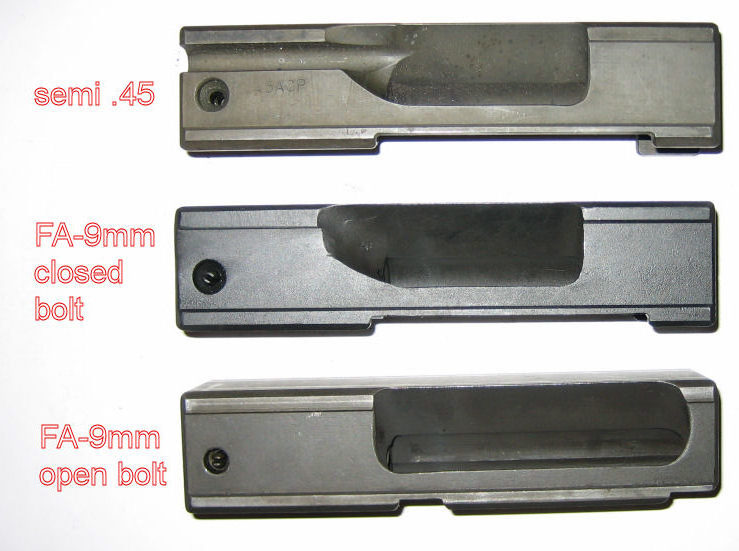
Below is a comparison of three UZI bolts. The picture below shows all IMI .45 caliber bolts.
Notice that the semi bolt is slotted for the bolt blocking rail and has no supporting lip at the breech.

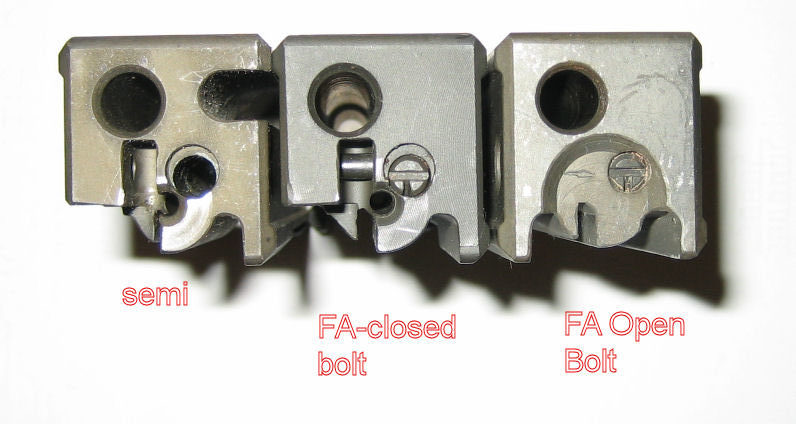
Below is a back view of the same bolts:
Finally a side view. Notice how the full size UZI closed bolts have a much smaller ejection port than the SMG bolt.
In addition, the closed bolts (semi and full auto) do not have the recoil spring hole counterbored as deep as in the open bolts.
The picture below shows a depth of 5.5435″ for this IMI 9mm OPEN bolt

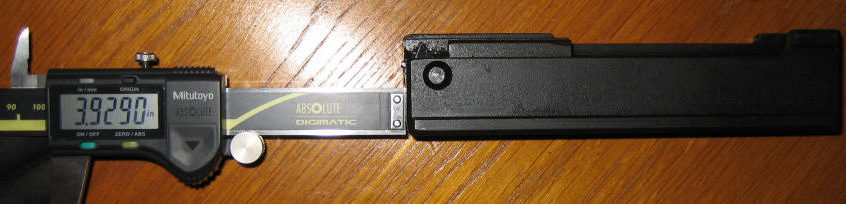
The picture below shows a depth of 3.929″ for the CLOSED bolt
Using the recoil spring from the closed bolt configuration then installing in the open bolt, you can see that the guide rod can be shoved all the way in the bolt without the springs becoming fully compressed.
Installing the same spring in the closed bolt setup, you can see how the spring gets fully compressed.
How does it work ?
Unlike most other closed bolt SMG’s/MG’s, the UZI has no hammer. There is nothing that the bolt “trips” in order to release the striker when the round is in battery. The FA closed bolt UZI needs the supporting lip as circled in the second picture from the top for proper FA functioning. With the absence of the this “lip”, when a round is being stripped from the mag, the firing pin would already be protruding forward and then would get hung up on the rim of the case.
With the lip there, the lip strips the round from the mag and the firing pin doesn’t touch the round/primer until the cartridge is in the chamber.
Since the striker is following the bolt in FA, the operating principle is identical to the OPEN bolt UZI in the FA mode.
This requires that the striker spring to be strong enough to be right behind the bolt to detonate the primer.
Why is it faster in closed bolt ?
Weight? No, the difference in weight is negligible.
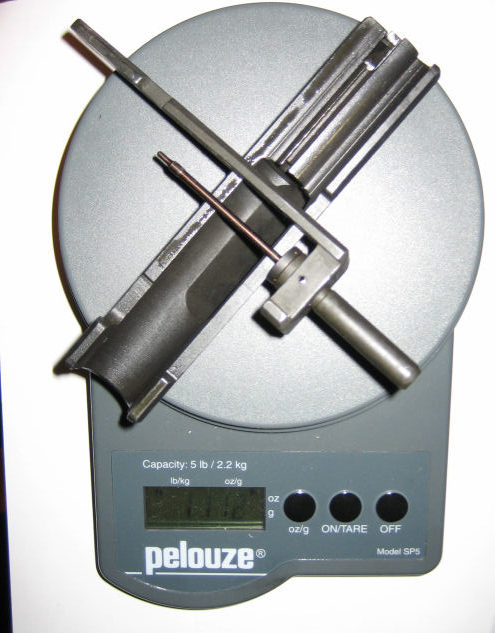
As seen in the picture below, this IMI 9mm OPEN bolt weighs 1 lb 8 oz. Its hard to see in this picture but it is an 8.
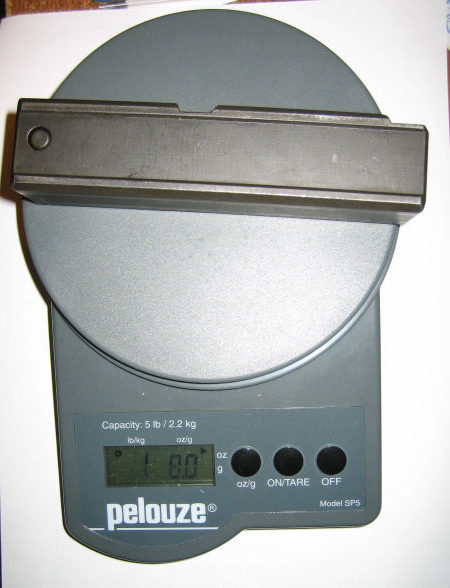
The closed bolt with the striker assembly is 1 lb 11 oz…..3oz heavier.
Bolt travel?
As you can see from the first photo. The closed bolt setup requires the use of the semi buffer.
While it is obvious that decreasing the bolt travel will definitely increase the ROF in the OPEN bolt UZI, in the case of the CLOSED bolt UZI, the buffer has very little if “any” impact on the ROF which will be demonstrated shortly.
There are at least 2 reasons for the need of the “semi” auto buffer.
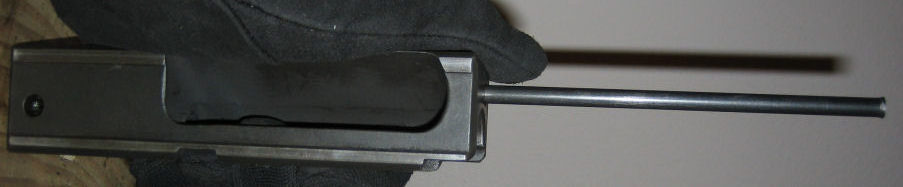
1. To prevent the bolt from going back too far which would hit the sear in semi auto operation. In semi auto, the sear pops back up when the trigger is pulled. In the picture below, the bolt is positioned at the farthest point it can go until the striker assembly bottoms out on the buffer. You can see that there is just a little bit more distance left before the back end of the “feet” of the bolt would contact the front of the sear.

2. To properly guide the striker spring. Without the buffer, the striker spring is not guided properly and will bind up.
Springs?
Yes, it is the springs.
A test needed to be performed without the buffer to determine the striker springs affect on the ROF.
As mentioned above:
1. The closed bolt assembly will not function without the buffer to properly guide the striker spring.
2. In FA, the open bolt and closed bolt function the same.
3. Weight is negligible between open and closed bolt.
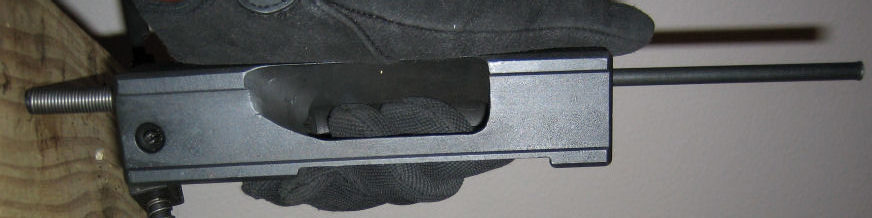
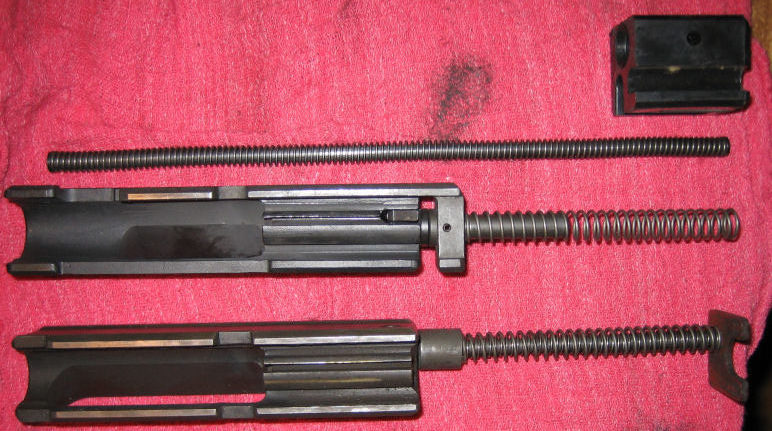
Below is the test setup. For illustrative purposes, the open bolt is shown with the open bolt recoil spring assembly installed and a different striker spring over the recoil spring. In the actual testing, the same recoil spring and striker that is shown with the closed bolt is used. The recoil spring, by the way was pretty weak compared to other open bolt SMG springs.
Note the spacer bushing that was made to make up the difference of the length of the striker (between the back of the bolt and front of the striker spring).
Note that the open bolt engages the sear much further forward than the closed bolt. In addition, when charging the open bolt with the bushing and striker spring the striker spring gets fully compressed before the sear can engage the bolt.
By just adding the striker spring, a lot more force is required to fully charge the bolt.
To quantify this, a cable was attached to the cocking knob with the muzzle pointing up to determine the amount of force required to pull the charging knob as far back as it would go. In all tests, the same recoil spring and striker springs were used.
[table]
Open bolt w/ recoil spring ONLY, 17.5 lbs
closed bolt assembly w/ recoil spring and striker spring, 32.5 lbs
open bolt w/ bushing recoil spring and striker spring, 27.5 lbs
[/table]
The 5 lb discrepancy is due to the closed bolt not being counterbored as deep as the open bolt.
ROF tests were done with 147 FNM ammo which is quite hot. Examination of once fired FNM 147 grain ammo commonly shows signs of over pressure. It also Chronographs right on the edge of being supersonic.
Using a PACT MK IV timer, the following ROF results were obtained:
[table]1. Closed bolt setup (as shown in first picture of article), 1459 RPM
2. Open bolt (using the same recoil spring from the CB setup – NO buffer) , 586 RPM
3. Open bolt (using same recoil/striker spring as from CB setup and bushing – NO buffer), 1122 RPM
[/table]
So just the addition of the striker spring and bushing increased the ROF by 536 RPM.
Why didn’t it make closer to 1459 RPM? Remember that due to the recoil spring hole being counterbored almost all the way on the open bolt, there is 5 lbs less force resisting the rearward motion of the bolt. This also means there is 5 lbs less force moving the bolt forward.
While I did think about making a sleeve to install in the open bolt to make up the difference in counterboring, removal of the sleeve would most likely be difficult and was not worth the effort for me to do.
Even at 27.5 lbs, that is a lot resistance for the bolt to push back. This is so much force that the bolt doesn’t even get to the point that it is pounding the buffer.
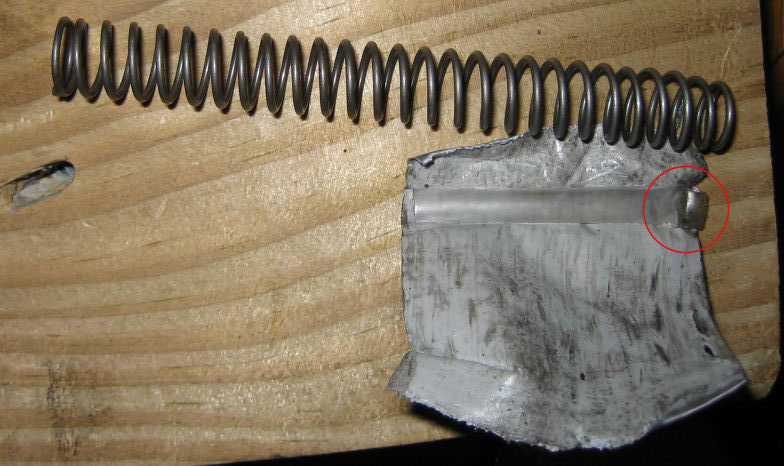
To prove that the buffer isn’t getting pounded, a drinking straw was cut to the same length as the buffer then duct taped to the back of the springs as seen below. If the buffer was getting pounded, the straw and duct tape should show some signs of severe deformation. The picture below was taken AFTER firing. You can see that it shows no signs of heavy deformation.

Below is another picture that shows the slight deformation of the straw from the bushing hitting it. Yes, it did deform a little but not enough to show that it was encountering much force because the recoil and striker springs were absorbing most of the force.
So how do I slow it down?
This is not an easy thing to do. There are other methods of FA closed bolt UZI operation which were not done by IMI (at least not commercially that I know of). The other methods are not the scope of this article and will be discussed later.
Due to the required strength of the striker spring for reliable primer detonation, it doesn’t leave much room for tinkering. There is also not much room for adding weight. As shown above, the weight is already a few ounces heavier than the open bolt. Adding more weight will most likely result in the gun being more bouncy during FA fire